
As a roofing specialist with over a decade of experience in the high desert, I’ve seen firsthand how quickly conditions can change. One minute it’s a calm, hot August day in El Mirage, and the next, a Red Flag warning is issued, and dry, gusty winds are carrying the threat of wildfire for miles. Many homeowners diligently clear brush from their yards, but they often overlook the single most vulnerable part of their home: the roof. It’s not the wall of flames that typically threatens a structure; it’s the blizzard of tiny, wind-driven embers that can travel a mile or more ahead of a fire, searching for a place to land and ignite.
These embers are relentless. They can find their way into the smallest cracks and openings, turning a defensible home into a casualty. Understanding where your roof is weakest is the first step in hardening it against this threat. Before the next wind event, taking the time to inspect your roof for these common vulnerabilities can make all the difference.
Common Signs and Symptoms
Identifying potential fire hazards on your roof doesn't always require getting up on a ladder. Many warning signs are visible from the ground. Use the following as a roof ember entry points checklist to conduct a quick visual assessment of your property.
- Gaps at the Roof Edge (Eaves and Fascia): Look where your roof overhang meets the walls of your home. Are there visible gaps between the fascia board and the roof deck? Wood can warp over time due to intense sun, creating small openings. We often find these are prime ember entry points. Look for eave gaps ember intrusion signs like small bits of debris, cobwebs that seem to go into the structure, or even bird nests, which indicate a breach.
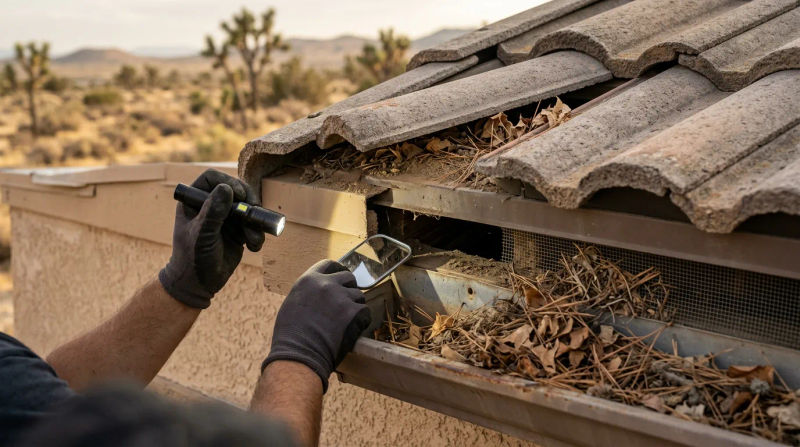
- Visible Debris in Roof Valleys and Gutters: Gutters and the valleys where two roof planes meet are natural collection points for leaves, pine needles, and twigs. From the ground, you can often spot this buildup. This isn't just an aesthetic issue; it's a pile of dry fuel waiting for an ember to land. A smoldering pile of leaves can burn for hours, eventually igniting the roof sheathing beneath it.
- Damaged or Open Vents: Your attic needs to breathe, but its vents can be a direct highway for embers. Check your gable-end vents, soffit vents (under the eaves), and any vents on the roof itself. If they have wide, 1/4-inch mesh screens - or worse, no screens at all - they are not sufficient to stop embers. A key part of our inspection process is measuring this mesh; modern standards call for 1/8-inch mesh to effectively block embers.
- Exposed Underlayment Underneath Roof Tiles: On tile roofs, the tiles themselves are fire-resistant, but the material underneath is not. Over time, the “bird stop” or filler at the eave line can degrade or fall out, creating a tunnel for wind and embers to blow up under the tiles and onto the flammable underlayment. Look for slipped or cracked tiles that might also expose this vulnerable layer.
- Gaps at Roof-to-Wall Junctures: This is especially common in homes built during the 1990s and 2000s housing booms, which often feature complex, multi-gabled rooflines. Where a lower roof section meets a second-story wall, the flashing can pull away, creating a narrow but dangerous gap. Embers get trapped in these corners and can easily find their way into the framing.
- Deteriorated Flashing: Flashing is the metal stripping around chimneys, skylights, and vents that prevents water intrusion. When its sealant cracks or the metal corrodes, it also creates an opening for embers.
- Damaged Shingles: Look for any shingles that are curled, cracked, or missing entirely. A single missing shingle exposes the underlayment and sheathing, giving an ember a direct path to flammable materials.
What Causes This Problem
Understanding the root causes of these vulnerabilities helps explain how embers enter attic through roof structures and why regular maintenance is so critical. These problems don't appear overnight; they develop gradually due to a combination of factors.
First and foremost is environmental exposure. The relentless sun and dry winds in El Mirage are tough on roofing materials. Asphalt shingles become brittle, wood fascia boards warp and split, and the caulking used to seal flashing and gaps dries out and cracks. This natural aging process is the primary creator of new ember entry points over time.
Second, original construction standards play a significant role. Many homes in our region, particularly those built in the 1990s and 2000s, were constructed before the latest fire-hardening building codes were adopted. At the time, the focus was on water, not fire. As a result, attic vents were often installed with larger 1/4-inch mesh, and eave construction wasn't designed to be completely sealed against ember intrusion. Our technicians are trained to identify these legacy vulnerabilities and recommend modern, code-compliant upgrades.
Finally, deferred maintenance and pests accelerate the decay. When gutters aren't cleaned, the trapped moisture and organic material can rot the fascia board, creating gaps. Birds and rodents looking for a nesting spot can easily widen a small hole in a soffit vent or eave, creating a significant breach that can allow embers to pour into your attic.
When to Call a Professional
Some fire-hardening tasks are suitable for a handy homeowner, while others carry significant risks and are best left to experienced professionals.
You can likely handle these tasks yourself:
- Cleaning out gutters and roof valleys, provided you can do so safely from a ladder.
- Performing a visual inspection from the ground to spot obvious issues like debris buildup or a damaged shingle.
- Clearing flammable materials like woodpiles and dry vegetation away from the base of your home.
We strongly recommend calling a qualified professional in these situations:
- If you have a tile roof. Walking on clay or concrete tiles without proper training can easily cause widespread cracking and damage, leading to expensive repairs. Our crews have the expertise and equipment to navigate tile roofs without causing harm.
- If you need to get on a steep or high roof. Safety is our top priority. Professional roofing teams use standardized safety protocols and equipment to prevent falls.
- If you need to replace or retrofit vents. Installing 1/8-inch ember-resistant mesh requires removing the old screen and ensuring the new one is installed with a perfect, gap-free seal. An improper installation defeats the purpose.
- If you identify gaps at the roof edge or around flashing. Sealing these requires knowledge of the right materials and techniques to ensure the seal is both fire-resistant and waterproof for long-term performance.
An experienced professional can perform a comprehensive inspection, identifying subtle vulnerabilities you might miss and providing a clear, prioritized plan for remediation.
Conclusion
The threat of wildfire in Southern California is a reality, and wind-blown embers are the primary danger to your home. Your roof is the most exposed surface, and its small, often-overlooked gaps are the most likely points of failure. By focusing on key areas like eaves, vents, roof valleys, and tile gaps, you can significantly reduce your risk.
Being proactive is your best defense. Don’t wait for a Red Flag warning to think about your roof’s condition. A simple inspection now can reveal vulnerabilities that are easy to fix, hardening your home against embers long before they are in the air. Taking these small steps provides invaluable peace of mind during a stressful fire season.
If you notice any of these signs, contact a local Roofing professional for an inspection.